Guide
How to set up Tonari the first time, and how to use it. If you run into trouble, see Support.
- Install on your Mac
- Allow access
- Connect your iPhone
- Use it on your iPhone
- Adjust on your Mac
- Disconnect
- Settings
1Install on your Mac
- Download the file (.dmg) from the download page.
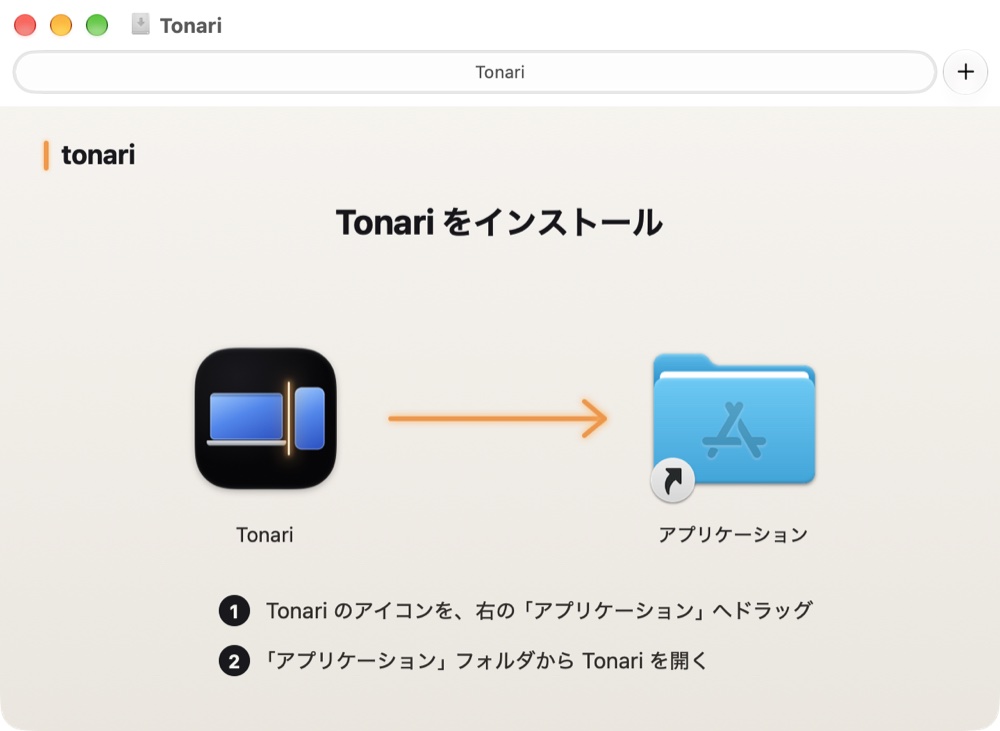
- Open the downloaded file. The window in the picture appears.
- Drag Tonari on the left to the Applications folder on the right.
- Open Tonari from the Applications folder.
Tonari lives in the menu bar. It doesn’t appear in the Dock.
2Allow access
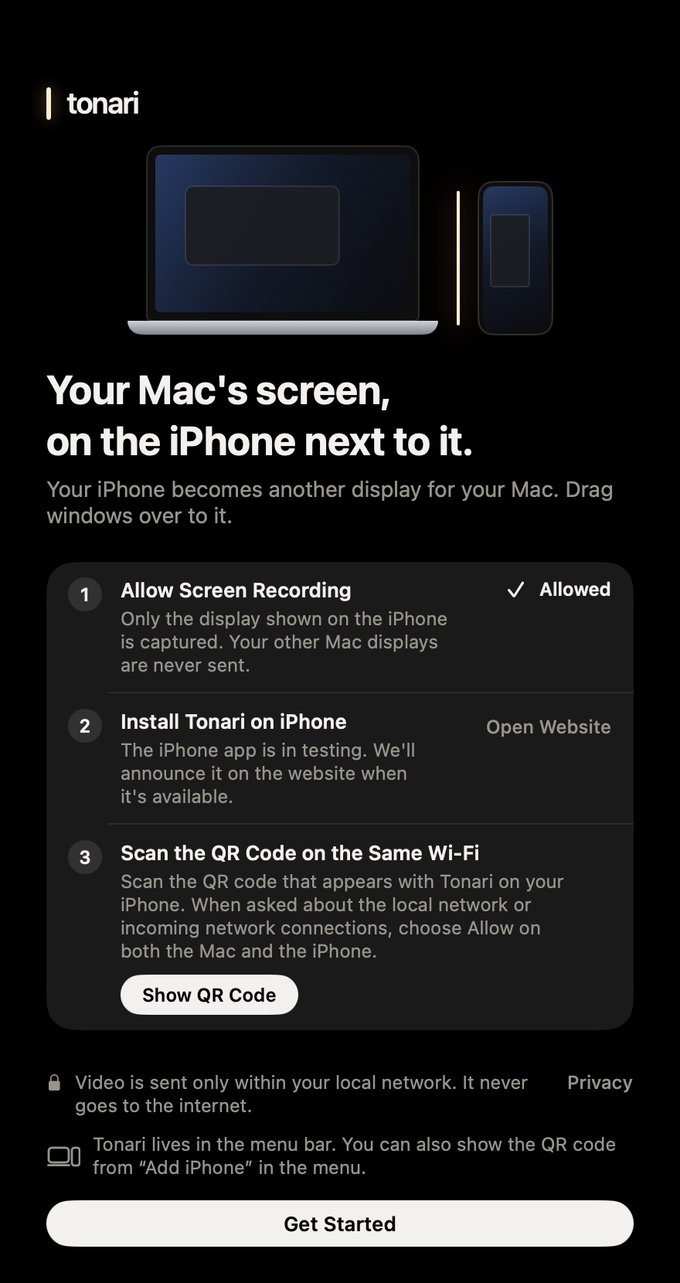
The first time you open Tonari, a welcome window appears. Tonari needs two permissions.
- Screen Recording: Click “Allow”, then turn on Tonari in System Settings > Privacy & Security > Screen & System Audio Recording. Then click “Reopen Tonari”. Tonari uses this only to capture the screen shown on your iPhone.
- Local Network: When macOS asks whether Tonari can find devices on your local network, click Allow. Tonari uses this to connect to your iPhone nearby.
3Pair with a QR code and connect
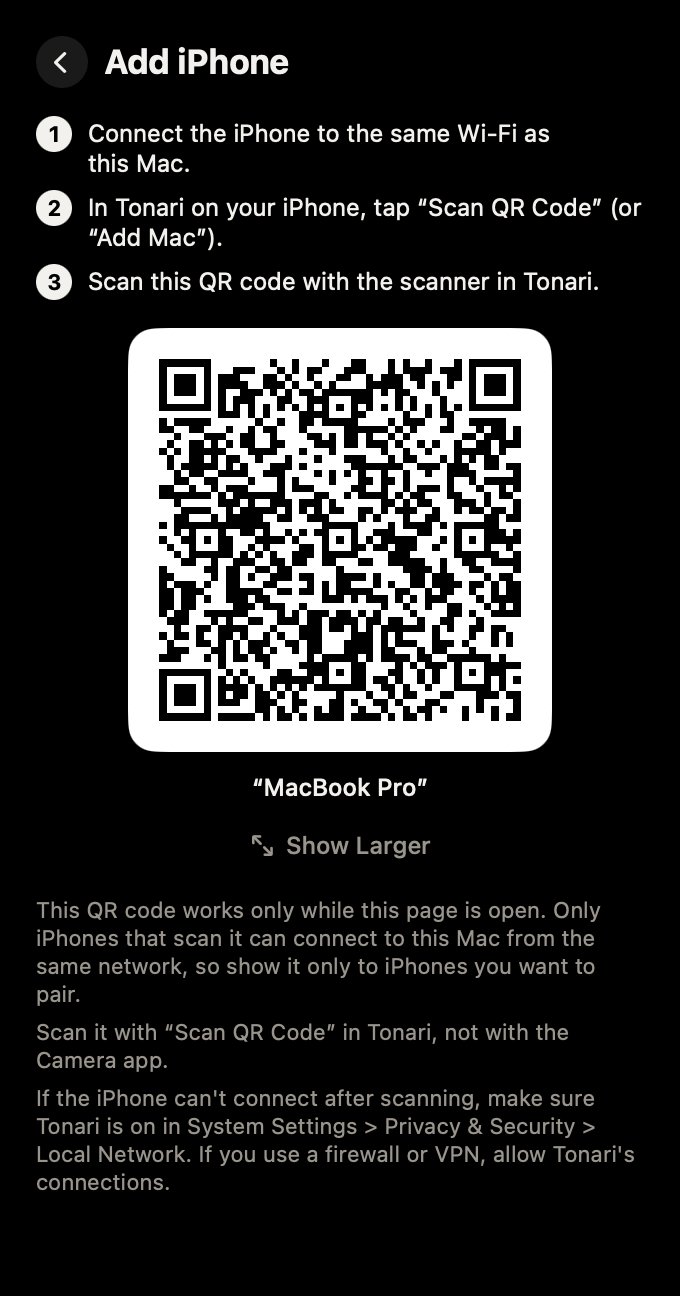
- Connect your Mac and iPhone to the same Wi-Fi.
- In Tonari in your Mac’s menu bar, click “Add iPhone (Show QR Code)” (for your second iPhone and later, “Add iPhone”). The QR code works only while this page (or the “Show Larger” window) is open.
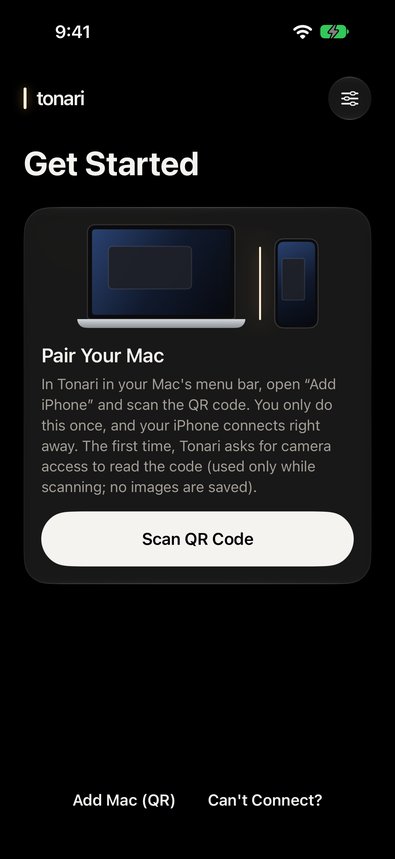
- In Tonari on your iPhone, tap “Scan QR Code” and point it at the QR code on your Mac. The Camera app can scan it too, but that adds one more confirmation, so we recommend “Scan QR Code” in Tonari. If you’re asked about Local Network and camera access along the way, tap Allow.
- The screen next to your Mac appears on your iPhone.
You only need to pair once. After that, when your last Mac is found, your iPhone connects to it automatically after 2 seconds.
Only iPhones that have scanned the QR code can connect to this Mac, and only from the same network. The connection is encrypted. Show the QR code only to the iPhone you want to pair. Once you close it, that QR code stops working. When a new iPhone is paired, the Mac menu lets you know. You can unpair iPhones one at a time in Settings > Paired iPhones on your Mac.
4Use it on your iPhone
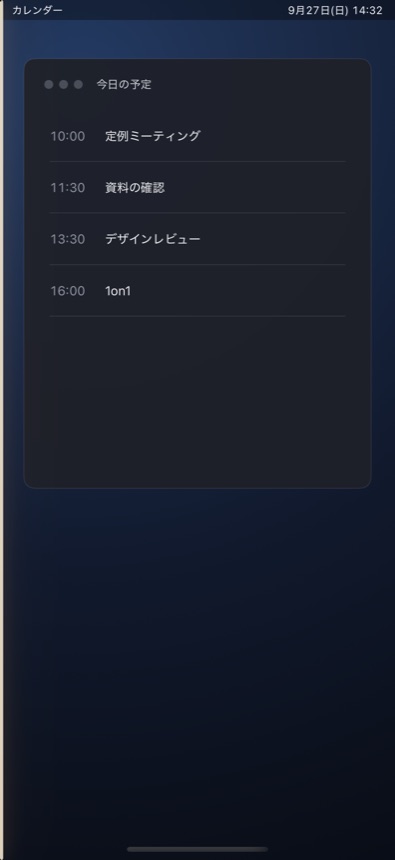
Your iPhone is another display for your Mac. Drag Mac windows onto the iPhone’s screen to use them there.
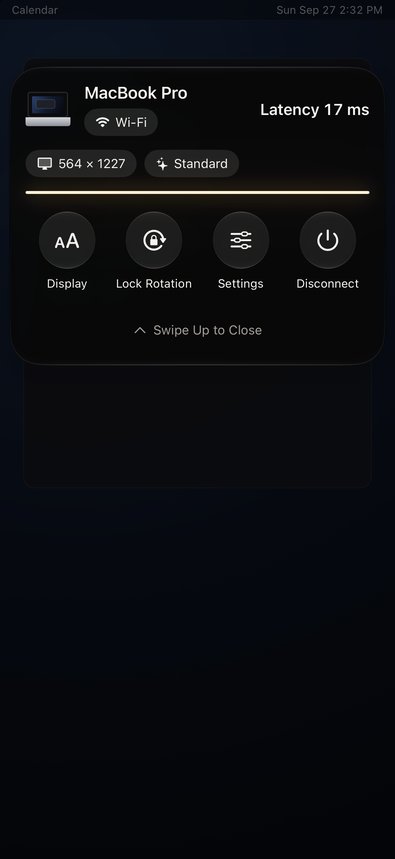
Swipe down from the top of the screen to show the controls.
- Text & Quality: Choose the text size (Larger, Standard, More Space) and the quality (Data Saver, Standard, High). What each option changes is shown below it.
- Lock Rotation: Keeps your iPhone’s orientation fixed.
- Disconnect: Ends the connection and goes back to the screen of nearby Macs.
5Adjust on your Mac
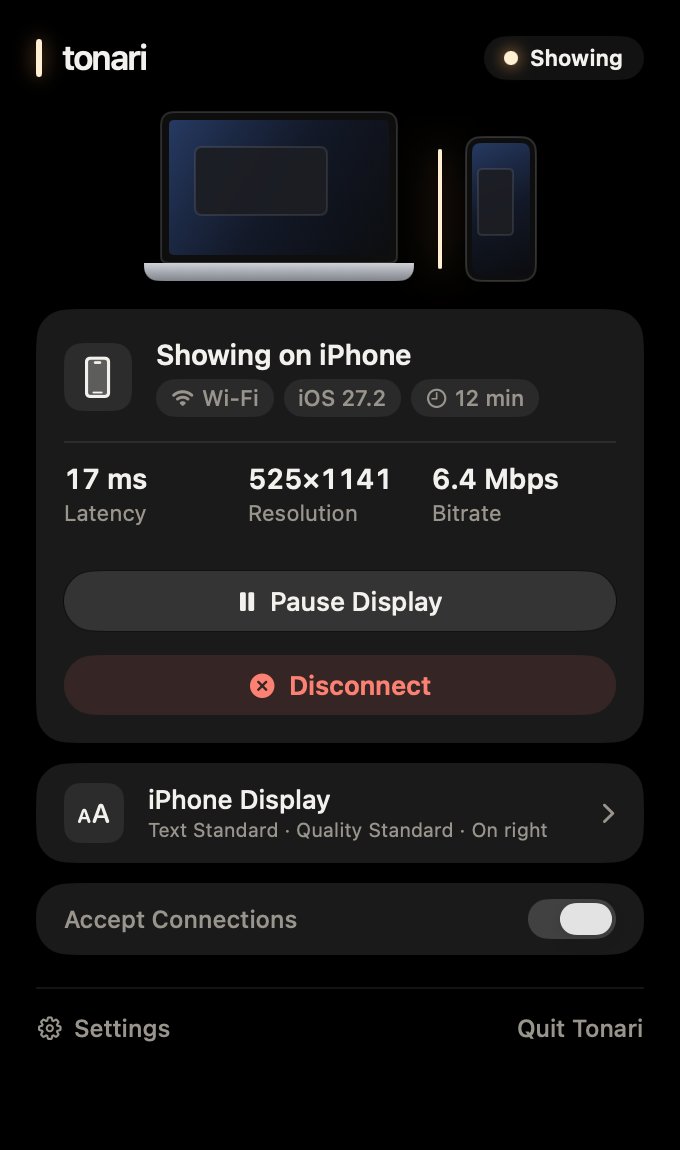
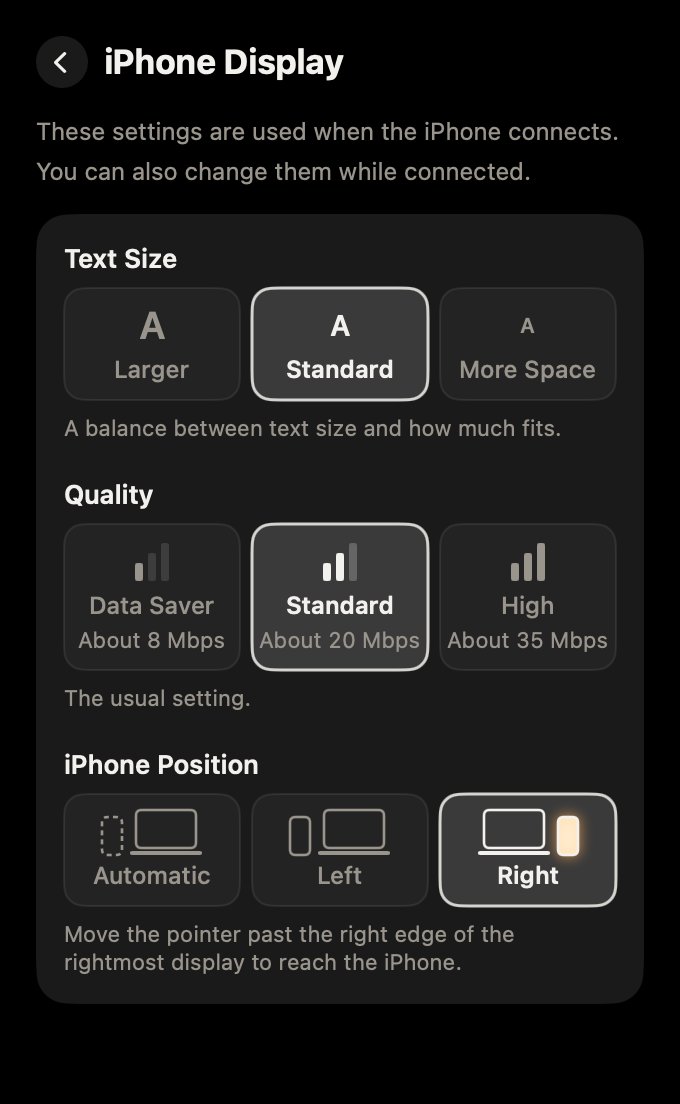
Click Tonari in the menu bar to see the connected iPhone, along with the latency, resolution, and data rate. Open “iPhone Display” to choose these three settings with pictures.
- Text Size: Larger, Standard, or More Space. Your Mac’s resolution changes right away, and so does the picture on your iPhone. On some iPhones, two of the sizes turn out the same; Tonari tells you when that happens.
- Quality: Data Saver (about 8 Mbps), Standard (about 20 Mbps), or High (about 35 Mbps).
- Position: Automatic, Left, or Right. With Left or Right, the iPhone is placed beyond your leftmost (or rightmost) display; move the pointer past that edge to go to the iPhone. With Automatic, it stays where macOS placed it.
The settings you choose here are also used the next time you connect.
6Disconnect
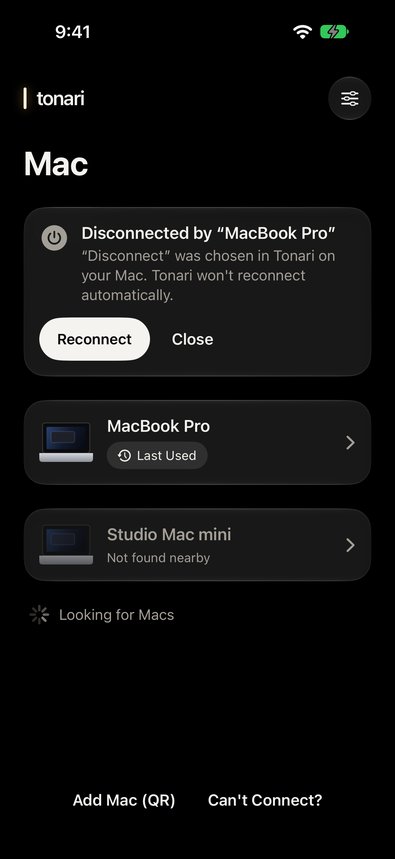
- From your Mac: Click “Disconnect” in the menu. The display is removed right away, and windows move back to your Mac. Your iPhone shows that it was disconnected and doesn’t reconnect on its own.
- From your iPhone: Tap “Disconnect” in the controls, or close Tonari.
After your iPhone disconnects, the display stays for a set time (30 seconds by default). If you reconnect within that time, your windows stay where they were.
7Settings
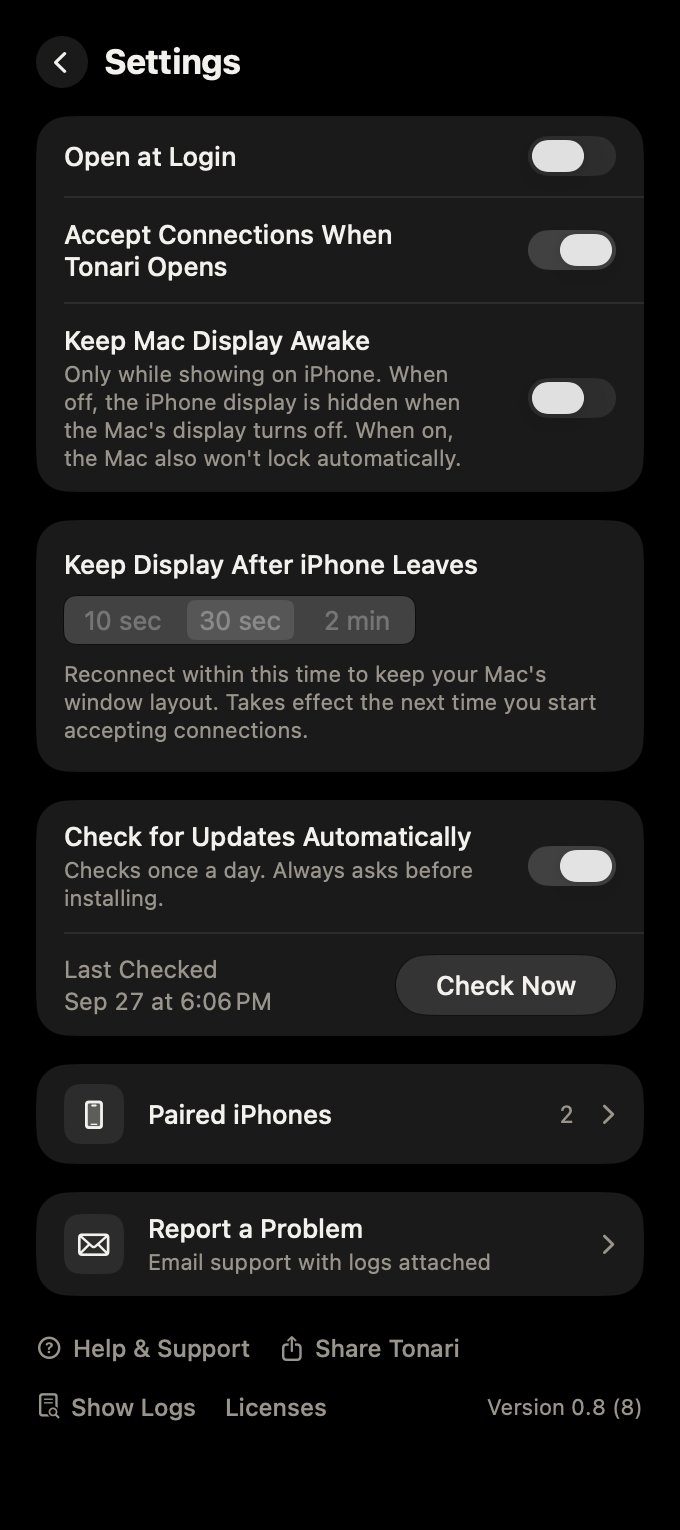
You can change these in Settings in Tonari on your Mac.
- Open at Login
- Accept Connections When Tonari Opens
- Keep Mac Display Awake (only while showing on your iPhone. When this is off and your Mac’s display turns off, the picture on your iPhone is hidden too)
- Keep Display After iPhone Leaves (10 sec, 30 sec, or 2 min. Takes effect the next time Tonari starts accepting connections)
- Check for Updates Automatically (once a day. Tonari always asks before installing)
- Report a Problem (contact us with the logs and crash reports attached)
Showing Tonari on a friend’s Mac
Ask your friend for permission first.
- Install Tonari on your friend’s Mac (see “How to install” on the download page). Your iPhone shows only the screen that Tonari creates next to their Mac. Their Mac’s own screen isn’t shown, but any window moved onto that extra screen is.
- Connect your iPhone to the same Wi-Fi as your friend’s Mac.
- Show the QR code with “Add iPhone” in Tonari on their Mac, and scan it with “Add Mac (QR)” in Tonari on your iPhone.
- When you’re done, go to Settings > Paired Macs on your iPhone and tap “Unpair” for their Mac. Your friend can remove the pairing by clicking “Unpair” next to your iPhone in Settings > Paired iPhones in Tonari on their Mac (or just delete Tonari).